Sarah stared at the chocolate milk stain spreading across her beige car seat like spilled ink on paper. Her 6-year-old had knocked over his cup during soccer practice pickup, and now the creamy brown mess was seeping deeper into the fabric with each passing second. She grabbed napkins from the glove box, frantically dabbing, but the stain just grew larger and darker.
By the time she got home, panic had set in. Google searches led her down the usual rabbit holes: vinegar solutions, baking soda pastes, and complicated homemade recipes that promised miracles. But something about the strong chemical smells and messy procedures made her hesitate.
What Sarah didn’t know was that professional detailers had been using a completely different approach for years – one that skips the kitchen pantry entirely.
Why Professional Detailers Skip the Home Remedies
Most people think cleaning car seats is about finding the strongest cleaning agent possible. Scrub hard enough, use enough product, and eventually the stain will surrender. But professional car detailers know something different: it’s not about power, it’s about precision.
- Gas stations must now show this one number that changes everything about filling up
- This cozy dinner trick made my anxiety disappear in 20 minutes
- Elderly drivers just got surprising news about their licenses that changes everything
- Why Pension Bureaucracy Is Keeping Your February 8 Increase From Reaching Your Bank Account
- Netherlands moved entire rivers to create new land—and barely anyone noticed
- Lazy gardener left plant roots in soil – what happened next shocked everyone
“I see customers come in all the time with seats that smell like salad dressing because they tried the vinegar trick,” says Mike Rodriguez, who’s been detailing cars for over 15 years. “The acid can actually set certain stains permanently, especially protein-based ones like milk or blood.”
The real secret isn’t what product you use – it’s understanding how car seats are built. Unlike regular furniture, automotive upholstery sits on top of foam padding that acts like a giant sponge. When you dump liquid cleaners on top, gravity pulls everything down into that foam layer where it can sit for weeks, creating odors and attracting more dirt.
Professional cleaning car seats involves controlling moisture from the moment it touches the fabric. Too much liquid drives the stain deeper. Too little won’t lift the contamination. The sweet spot requires a completely different approach than most DIY methods suggest.
The Three-Step Method That Actually Works
Here’s what automotive professionals use instead of vinegar and baking soda concoctions:
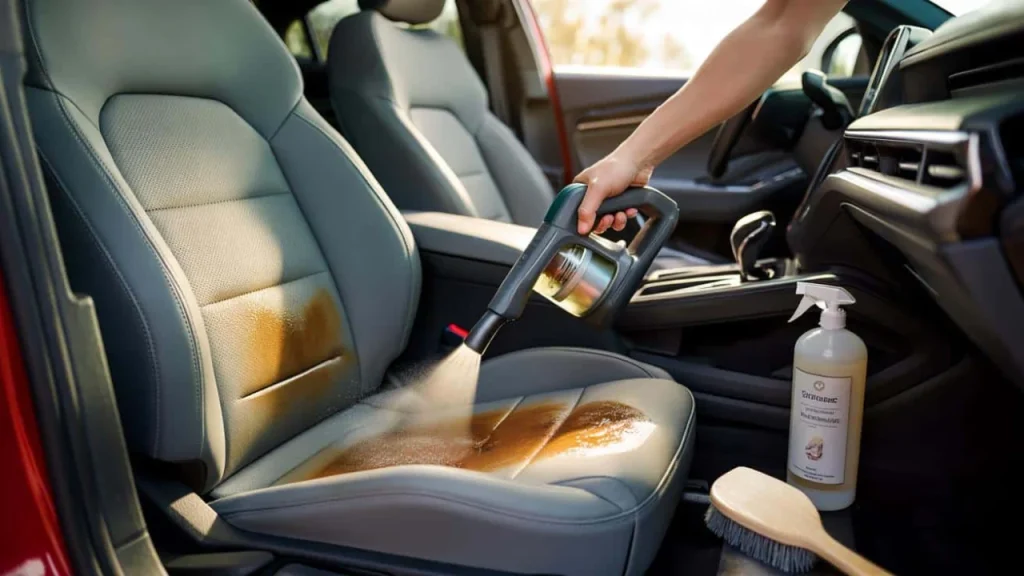
- Step 1: Controlled Moisture Application – Use a spray bottle with diluted automotive upholstery cleaner (about 1:10 ratio with warm water)
- Step 2: Mechanical Agitation – Work the solution with a soft-bristled brush in circular motions
- Step 3: Immediate Extraction – Remove moisture and dirt with a wet vacuum or steam cleaner
The key difference is that final extraction step. Most home methods leave moisture in the seat, which means the stain materials can redistribute and create new problems.
| Home Method | Professional Method | Results |
|---|---|---|
| Vinegar + scrubbing | pH-neutral cleaner + extraction | No odor, complete removal |
| Baking soda paste | Controlled moisture application | No residue left behind |
| Dish soap solutions | Automotive-specific products | Won’t damage fabric coatings |
“The biggest mistake people make is thinking more product equals better results,” explains Jessica Chen, a certified automotive detailing instructor. “I’ve seen leather seats ruined because someone thought baking soda was ‘natural’ and therefore safe. It’s actually quite abrasive on delicate surfaces.”
What This Means for Your Next Stain Emergency
When that inevitable spill happens in your car, your first 10 minutes determine everything that follows. Fresh stains are always easier than set-in ones, but even old stains respond better to extraction-based cleaning than absorption methods.
For immediate spill response, blot don’t rub. Rubbing spreads the contamination across more fabric fibers and pushes liquid deeper into the padding. Use a clean cloth to absorb as much as possible, then address the cleaning when you have proper tools.
Different stain types need different approaches:
- Food and drinks: pH-neutral cleaners work best without setting proteins
- Mud and dirt: Let dry completely first, then vacuum before applying any moisture
- Grease and oil: Cornstarch can absorb fresh oil, but old stains need degreasing agents
- Bodily fluids: Enzyme cleaners break down proteins without harsh chemicals
The professional approach also considers what’s underneath the fabric. Many car seats have heating elements, airbag components, or electronic sensors that can be damaged by excessive moisture or acidic solutions.
“I always tell customers to think about their car seats like expensive clothing,” says Rodriguez. “You wouldn’t pour vinegar on a silk shirt and expect good results. Automotive fabrics deserve the same respect.”
Tools You Actually Need (And Don’t Need)
Forget the elaborate DIY setups with multiple household products. Professional-level cleaning car seats requires surprisingly few specialized tools:
- A quality spray bottle for controlled application
- Soft-bristled brush (old toothbrush works for small areas)
- Wet vacuum or carpet cleaner with extraction capability
- Automotive upholstery cleaner (not household alternatives)
- Microfiber cloths for final cleanup
The investment in a small wet vacuum pays for itself quickly. These machines cost less than two professional detailing sessions but handle dozens of cleaning emergencies over years of ownership.
What you don’t need is an arsenal of kitchen ingredients. Professional automotive cleaners are pH-balanced specifically for car interiors, won’t leave residues that attract more dirt, and won’t interact poorly with fabric treatments or adhesives.
“The home remedy trend comes from good intentions, but cars aren’t houses,” notes Chen. “Different materials, different contamination sources, different cleaning requirements. What works on your kitchen counter might destroy your car’s interior.”
FAQs
Can I use dish soap to clean car seats?
Dish soap can leave residues that attract more dirt over time. Automotive cleaners are formulated specifically for car fabrics and won’t create this problem.
Why do my car seats smell after cleaning with vinegar?
Vinegar is acidic and can react with fabric treatments or get trapped in foam padding. The smell often gets worse in hot weather when the acid breaks down further.
How often should I deep clean my car seats?
Every 3-6 months for regular use, or immediately after spills. Professional cleaning car seats prevents stains from setting permanently.
Will baking soda damage leather seats?
Yes, baking soda is abrasive and can scratch leather surfaces or strip protective coatings. Use leather-specific cleaners instead.
What’s the best way to dry car seats after cleaning?
Leave windows cracked for ventilation and park in shade. Direct sunlight can set remaining stains or cause fabrics to fade.
Can I prevent stains instead of cleaning them?
Fabric protector sprays create a barrier against spills, making cleanup easier when accidents happen. Reapply every 6-12 months for best results.